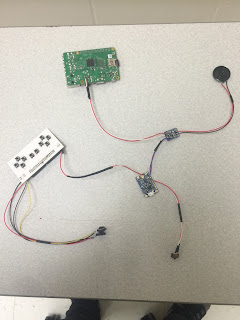
 I first soldered the header box and buttons to my PCB. Then I connected the speaker to the amp by tinning the wires and connecting it to the positive and negative pins on the amp. Afterwards I wired the amp to the PowerBoost. This is how the amp is supplied power. I also connected the switch. Since I was DYING to see if I was doing this right, I took a break from soldering to put in the battery. I flipped the switch and the light came on! After this boost of confidence, I continued soldering. I soldered wires to the two audio pins on the Pi, and then connected them to the amp. This is how the speaker will play the sound. Lastly, I connected the shoulder buttons to the gamepad, and the gamepad to the PowerBoost.
I then connected the gamepad to the PiTFT using a ribbon cable. I flipped the switch and my Raspberry Pi turned on! My soldering was a success!!!!!
Below is a video of me putting my pi and some of the extra components into its case.


No comments:
Post a Comment